Archive
علبة باندورا ، ولا سحر و لا شعوذة ، ما هو الفيرتشوال بروسيسور ، الفيزيكال بروسيسور ، مين الولية اللي اسمها نوما
علبة باندورا ، ولا سحر و لا شعوذة ، ما هو الفيرتشوال بروسيسور ، الفيزيكال بروسيسور ، مين الولية اللي اسمها نوما ، و بوناس تأثير كل ده على لايسنسنج الاس كيو ال ========= في هذا المقال – ما هو Socket, Physical CPU, Virtual CPU, physical Core, virtual core, NUMA و غيره و غيره – تطلع ايه ال Thread – ما هو الفرق بين هايبر في و في ام وير في البروسيسنج – ما هو تأثير كل هذا على لايسنسنج مايكروسوفت ======== علبة باندورا و كما تقول الاساطير هي العلبة اللي تم اعطاؤها لباندورا و تم تخزين كل شرور العالم في هذه العلبة ، و هو تعبير مناسب جدا اجده يليق جدا كل ما اجي في موضوع الفيرتشوال و الفيزيكال بروسيسور ، لان كل مرة يتفتح ، الناس تتخانق مع بعض مع انه موضوع سهل طيب ، علشان منتوهشي حنبتدي كده بشوية حاجات حقولها بالبلدي علشان منتخانقشي مع بعض باقي المقال ، ثانيا انا غير مسؤول عن اي عسر هضم او تلبك معوي يأتي بسبب قراءة هذا المقال اولا ، انسااااااااااااا خاااااااااااااالص انه الفيزيكال بروسيسور هو الفيرتشوال بروسيسور ، و انه اما بتعمل في ام ب فيرتشوال برسيسور اكنك بتاخد كور من على الفيزيكال سي بي يو ثانيا ، مفيش في هذه المجرة اي حد بيقول انه في علاقة (شرعية او غير شرعية) بين الفيزيكال كور و الفيرتشوال كور و الفيرتشوال بروسيسور و الفيزيكال بروسيسور ، انسا ده تمامامممممممممممممممممممااااااااااا طب ايه يا عم ؟! علشان نتفق ، خلينا نبتدي من الاول على بياض بشوية تعريفات Physical Socket or Socket و دي البروسيسور نفسه في حد ذاته على السيرفر ، بيجي بانوع مختلفة و في اكتر من موديل باكتر من كور ، و ممكن يكون عندك بروسيسور ، 2و4و8و16 و هكذا من البروسيسور ، كل بروسيسور عليه اكتر من كور Core ده وحدة بروسيسنج مستقلة جوا البروسيسور ، في بروسيسور ب 2 و 4 و 8 و 12 و 16 و 24 كور ، و في تعريفات و انوع مختلفة Hyperthreading ده تقنية بتتيح تنفيذ اكتر من عملية في نفس الوقت ، انساها مؤقتا NUMA في عالم المالتي بروسيسنج (الفيزيكال) في ميموري كاش ، و علشان نسرع الميموري اكسس بقا في حاجة اسمها النوما ، و هي تقنية بتتيح الاكسس عبر الكاش المختلف ، بس الاكسس اللوكال بيكون اسرع من الاكسس للكاش من على البروسيسور التاني الموجود على باس تاني يعني الكاش متوفر بنفس السرعة على نفس الباس ، بس برضو متوفر عبر الباس التاني و لكن بسرعة ابطأ ، و لو الابلكيشن NUMA AWARE لازم يتستعمل و يحاول يخلي الداتا بتاعته في نفس الكاش علشان يقلل ال Cross Talk http://en.wikipedia.org/wiki/Non-uniform_memory_access طب طلعلنا ليه النوما ده ….اتقل ============= لو وصلت لحد هنا ، فانت كويس جدا ، نيجي بقا نلعب الالعاب السحرية يطلع ايه اصلا الفيرتشوال بروسيسور في الفيرتشوال ماشين ؟! نتيجة لاسباب كتيرة منها التعليم الحكومي و الاستسهال ..ناس كتير بتقولك انه الفيرتشوال بروسيسور يساوي فيزيكال بروسيسور ، و ده غير صحيح بالمرة …ليه بقا ؟!!! لانه الهايبرفايزور (ايا كان مايكروسوفت او في ام وير) بيستعمل حاجة اسمها ال CPU Scheduler ال Scheduler مهمته انه ياخد العمليات من الفي ام و يعملها جدولة على الفيزيكال بروسيسورز ، يعني الفي ام بتبعت التعليمات للتنفيذ ، السكاديولار بياخدها و ينفذها على فيزيكال بروسيسور العمليتين دول اسمهم Wait, Ready, Run فأي عمليه هي مستنية دورها في التنفيذ ، اما ريدي للتنفيذ و مستنية دورها من السكاديولار او ران و بيتم تنفيذها و هنا بيجي دور الكوانتام الكوانتام وحدة زمنية بيستعملها السكاديولار علشان يجدول عملياته ، و مقدارها 50 ميلي ثانية ، و هنا العملية بتنتقل من حالة الانتظزار و تخش التنفيذ كل شوية ، و بيبقا على السكاديولار انه يتحكم في العملية و يعين البروسيسور للفي ام علشان يتم تنفيذ العملية المراد تنفيذها و هنا اما بنتكلم ، بنقول حاجة مهمة جدا ، انه الفيرتشوال بروسيسور هو مجرد وحدة زمنية تمنح للفي ام علشان تقدر تنفذ تعليماتها يعني ايه فلنفترض انه لدينا اتنين في ام على هوست فيه اربعة بروسيسور ، كل بروسيسور اتنين كور ، في ام فيها اربعة فيرتشوال بروسيسور و التانية فيها 1 فيرتشوال بروسيسور ، بحسبة مبسطة سيكون التايم مقسم الى 5 اجزاء و بالتالي نظريا الفي ام الكبيرة تستحوذ على باور 6.4 بروسيسنج ، و الفي ام التانية 1.6 ، و هو ما يعزز مفهوم انه الفيرتشوال بروسيسور ربما يتخطى 100% من قوة البروسيسور (طبعا المفهوم مسطح جدا و لكن للتوضيح) طبعا يتعقد الموضوع كل ما زادت الفي ام و زادت الفيرتشوال بروسيسور و زادت الفيزيكال بروسيسور و الكورز المهم اللي تبقا فاهمه ، انه الفيرتشوال بروسيسور هو Time Allocation على الفيزيكال بروسيسور طب انا عايز اضمن قوة معينة او ميجا هرتز معينة لل في ام ، ده وارد جدا لانه ممكن تحط Reservations w guarantee على الفي ام … طبعا المفهوم اعلاه حلو و جميل لو مفيش خناقة على البروسيسنج ، بس لو في اكتر من في ام و في اكتر من تايم الوكيشن و في مشكلة في الريسورسز ، بيبتدي يشتغل ال Shares, reservations and CPU scheduler علشان يبتدوا يعينوا ريسورسز صح للي في ، و ده برضوا معناه ، انه ممكن تيجي الفي ام تنفذ تعليمة على بروسيسور تلاقيه مشغول فبيكون على السكاديولار انه يلاقي بروسيسور فاضي علشان ينفذ التعليمة بس هنا بقا يجي الكلام ، انهون بروسيسور و انهون باس ، و هنا يبتدي الكلام على النوما و عدد الكور مقابل عدد البروسيسور زي ما اتفقنا فوق ، مفيش علاقة خالص بين الفيزيكال بروسيسور و الفيزيكال كور و الفيرتشوال بروسيسور و كور ، لانه الفيرتشول بروسيسور و كور هما مجرد مدة زمنية ، و ده معناه انه فعلا الفي ام باتنين سي بي يو و اتنين كور ، ستساوي في الكفاءة في ام بفيرتشوال سي بي واحد و اربعة كور ، لانهم هم الاتنين ليهم نفس الوزن من السكاديولار http://frankdenneman.nl/2013/09/18/vcpu-configuration-performance-impact-between-virtual-sockets-and-virtual-cores/ ، طب فين التتة التتة حتيجي اما تعمل في امات كبيرة ، تتخطى حجم النوما بتاعتك او ما يعرف بال Wide VMs و اللي الكونفيجريشن بتاعتها بتتخطى حجم نوما بتاعتك ، و في بلوج جميل على الموضوع ده http://blogs.vmware.com/vsphere/2013/10/does-corespersocket-affect-performance.html طبعا الكلام كده جميل اوي و ابتدت تتضح الصورة ، حيتبقا بقا حاجة مش حنتكلم فيها علشان المية متخشش على الزيت الا و هي الهايبر ثريدينج… اخر حاجة هي الثريد ؟! و ده تعبير بيطلق على عدد الفي امات اللي ممكن نحملهم على الكور لو معنديش حسبة منطقية للميجا هرتز اللي حقدر انفذهم يعني لو عندي بروسيسور فيها 12 كور ، فهو لو حيشغل في امات بسيرفر ابليكيشن ممكن يشغل بين 3 الى 6 ثريدز (كل ثريد تمثل في ام من فيرتشوال سي بي يو واحد فقط) يعني توتال 36 في ام ، كل في ام فيها فيرتشوال سي بي يو واحد ، و طبعا الارقام حتقل لو ابتديت تزود في الفيرتشوال سي بي يو طب هل في فرق بين في ام وير و هايبر في ؟! حاجات بسيطة او ما يعرف بال Gang Scheduling اللي مش بتستعمله مايكروسوفت ، و اختلافات بسيطة في خوارزمية تعيين و اختيار الكور و البروسيسور ، بس يبقا الكونسبت ثابت مراجع اخرى http://www.virtuallycloud9.com/index.php/2013/08/virtual-processor-scheduling-how-vmware-and-microsoft-hypervisors-work-at-the-cpu-level/ http://www.vmware.com/files/pdf/techpaper/VMware-vSphere-CPU-Sched-Perf.pdf طب و لايسنسنج الاس كيو ال؟! باختصار انت عندك اما اس كيو ال 2012 او 2014 ، في الاس كي ال 2008 و 2012 كانت الرخصة بالفيزيكال بروسيسور ، اللي بيديك رخصة لعدد 4 كور (فيرتشوال) في حين في ال 2014 ، دايما الرخصة بالكور طب يعني ايه ، يعني مايكروسوفت جايما بتعد الكور على الفي ام ، بحد ادنى اتنين كور ، يعني لو عندك 4 بورسيسور و كل بروسيسور كور ، هو نفس اللايسنس لبروسيسور ب 4 كور مراجع http://download.microsoft.com/download/3/D/4/3D42BDC2-6725-4B29-B75A-A5B04179958B/MicrosoftServerVirtualization_LicenseMobility_VLBrief.pdf
You receive error message : ERROR: MsiGetActiveDatabase() failed. Trying MsiOpenDatabase(). while installing VMware SRM 5.5 and installation fails
If you are installing VMware SRM 5.5 you might get the following error message in installer:
Can not start VMware Site Recovery Manager Service.
when digging in the installation logs you will find the following error message:
ERROR: MsiGetActiveDatabase() failed. Trying MsiOpenDatabase().
To fix this issue, change the logon on the VMware Site Recovery Manager service from Local System to an Account with the DB Owner on the database.
vCloud Director automation via Orchestrator, Automating Org,vDC,vApp Provisioning via CSV Part4 – Adding Approval and Email Notifications
This is the final blog of this series, in the previous 3 parts:
we explored how to automate most of cloud provisioning elements including organizations, vDCs, vAPPs and Virtual machine and customizing their properties like adding vNICs, VHDs and memory/CPU.
In this final part, we will explore how we can add approval cycle to the above provisioning.
In our Scenarios, we will send an email notification to the administrator that include the CSV file used to generate the cloud as attachment, and include a hyperlink to approve/deny the request, let us see how we can do it.
Import the PowerShell Plugin:
We will use Powershell to send email notifications, I tried to use Javascripting but had no luck with attaching the CSV, Powershell comes to rescue here, so you need to import the powershell plugin to your Orchestrator through the Orchestrator configuration interface:
Once you import the powershell plugin, make sure to restart the VCO.
When you complete the restart, go to add a powershell host, you need to make sure that remote powershell is enabled on the server, once done kick of the add powershell host workflow:
if you are adding a kerberos host, make sure to type the username in UPN or email format otherwise you will get this weird error: Client not found in Kerberos database (6) (Dynamic Script Module name : addPowerShellHost#16)
Once added you are ready to go.
Building the Approval workflow:
Build a workflow that includes user interaction and decision as following:
The attributes are defined as following:
the scriptable task, sends email notification with attachments as we said, let us the Javascript portion of it:
//var scriptpart0 = "$file =c:\\customer.csv"
// URL that will open a page directly on the user interaction, so that user can enter the corresponding inputs
var urlAnswer = workflow.getAnswerUrl().url ;
var orcdir = "C:\\orchestrator\\" ;
var fileWriter = new FileWriter(orcdir + name+".html")
var code = "<p>Click Here to <a href=\"" + urlAnswer + "\">Review it</a>";fileWriter.open() ;
fileWriter.writeLine(code) ;
fileWriter.close() ;var output;
var session;
try {
session = host.openSession();
var arg = name+".html";
Server.log (arg);
var script = ‘& "’ + externalScript + ‘" ‘ + arg;
output = System.getModule("com.vmware.library.powershell").invokeScript(host,script,session.getSessionId()) ;
} finally {
if (session){
host.closeSession(session.getSessionId());
}
}
The script attaches the CSV file, then starts the powershell script from the host and attaching the HTML file (in the arguments, this HTML file contains a link to approve the reqeust, and it was built in the above Javascript), let us see the powershell script:
Param ($filename)
$file = "c:\orchestrator\customer.csv"
$htmlfile = "C:\orchestrator\" + $filename
$smtpServer = "vcenter.tsxen.com"$att = new-object Net.Mail.Attachment($file)
$att1 = new-object Net.Mail.Attachment($htmlfile)$msg = new-object Net.Mail.MailMessage
$smtp = new-object Net.Mail.SmtpClient($smtpServer)
$msg.From = "emailadmin@test.com"
$msg.To.Add("administrator@tsxen.com")
$msg.Subject = "New Cloud is requested"
$msg.Body = "A new cloud service is request, attached the generation file, you can approve the request using the below link"
$msg.Attachments.Add($att)
$msg.Attachments.Add($att1)$smtp.Send($msg)
$att.Dispose()
Now you are ready to go, let see the outcome:
If you run the script successfully, you will receive the following email notification:
you can see the link to approve the request and the CSV file included in the email to approve it, if you click on the link, you can see the request and approve/deny it:
What is next:
You might think this is the end, however it is not, this blog series is the foundation of cloud automation and it is just a placeholder, cloud automation can go epic, here is some improvement suggestions for people who might want to take it further:
- Add error checking, the script is error checking free which might raise serious issues in production environment.
- Add More logging.
- Add automation to network provisioning and vShield operations.
- Automate application provisioning on top of provisioned VMs.
the above is a small list, we can spend years adding to this list, but those are the areas that I will be working on in the upcoming version of this script.
Till next.
vCloud Director automation via Orchestrator, Automating Org,vDC,vApp Provisioning via CSV Part3- Adding NICs, CPU and modify Memory
We explored the building blocks for automating vCloud Director cloud provisioning, we provisioned Orgs, vDCs and VMs by reading a CSV file and automating most of the provisioning process, in this blog post we will take a look on how we can add NICs, CPU and modify memory based on VM specs.
Remember, the CSV file structure is:

so we need to have VM name, Template name, No. of vCPUs, memory in GB, no. of HDDs and the size of each harddisk.
To start, you will need to clone add NIC to VM, Change Number of CPUs, Change memory capacity and Add a harddisk workflows.
Next, we will create what we will call “A caller” workflow, because each workflow requires certain parameters that only can be ready via query because some of them still not created yet like VM with that name or vDC for example.
We will create 4 callers to call each of the above work flows, here are their Java Scripts code:
VHD Caller Script:
var queryService = vapp.getHost().getQueryService();
var expression = new VclExpression(VclQueryVMField.NAME, vmname , VclExpressionType.EQUALS);
var filter = new VclFilter(expression);
var params = new VclQueryParams();
params.setFilter(filter);
var resultSet = queryService.queryRecords(VclQueryRecordType.ADMINVM, params);
var records = resultSet.getRecords(new VclQueryResultAdminVMRecord());
Server.log (records.length);
for each (var record in records) {
if (record.vdc == vdc.getReference().href) {
Server.log("i am in the VMREF")
var VMref = new VclReference();VMref.href = record.href;
VMref.name = record.name;
VMref.type = record.type;
myVMname = host.getEntityByReference(VclFinderType.VM, VMref);
}
}
Server.log (myVMname.name);
var addHDworkflowParameters = new Properties();
addHDworkflowParameters.put("vm",myVMname);
addHDworkflowParameters.put("size",hdsize);
addHDworkflowParameters.put("controller","SCSI Controller 0");
var myaddHDWorkflowToken = new WorkflowToken() ;
myaddHDWorkflowToken = MyAddVHDWF.execute(addHDworkflowParameters);
myaddHDworkflowTokens = new Array();
myaddHDworkflowTokens.push(myaddHDWorkflowToken);
System.getModule("com.vmware.library.workflow").waitAllWorkflowComplete(myaddHDworkflowTokens)
Memory Caller:
var ChangeVMMemParameters = new Properties();
var queryService = INPVMvApp.getHost().getQueryService();
var expression = new VclExpression(VclQueryVMField.NAME, INPVMNameString , VclExpressionType.EQUALS);
var filter = new VclFilter(expression);
var params = new VclQueryParams();
params.setFilter(filter);
var resultSet = queryService.queryRecords(VclQueryRecordType.ADMINVM, params);
var records = resultSet.getRecords(new VclQueryResultAdminVMRecord());
Server.log (records.length);
for each (var record in records) {if (record.vdc == vdc.getReference().href) {
Server.log("i am in the VMREF")
var VMref = new VclReference();VMref.href = record.href;
VMref.name = record.name;
VMref.type = record.type;
myVMname = host.getEntityByReference(VclFinderType.VM, VMref);
}
}
Server.log (myVMname.name);
ChangeVMMemParameters.put("vm",myVMname);
ChangeVMMemParameters.put("newSize",INPNewMem);var ChangeVMmemWorkflowToken = new WorkflowToken() ;
ChangeVMmemWorkflowToken = AttChangeVMMemWF.execute(ChangeVMMemParameters);
ChangeVMmemWorkflowTokens = new Array();
ChangeVMmemWorkflowTokens.push(ChangeVMmemWorkflowToken);
System.getModule("com.vmware.library.workflow").waitAllWorkflowComplete(ChangeVMmemWorkflowTokens)
Change CPU Caller:
var ChangeVMCPUParameters = new Properties();
var queryService = INPVMvApp.getHost().getQueryService();
var expression = new VclExpression(VclQueryVMField.NAME, INPVMNameString , VclExpressionType.EQUALS);
var filter = new VclFilter(expression);
var params = new VclQueryParams();
params.setFilter(filter);
var resultSet = queryService.queryRecords(VclQueryRecordType.ADMINVM, params);
var records = resultSet.getRecords(new VclQueryResultAdminVMRecord());
Server.log (records.length);
for each (var record in records) {if (record.vdc == vdc.getReference().href) {
Server.log("i am in the VMREF")
var VMref = new VclReference();VMref.href = record.href;
VMref.name = record.name;
VMref.type = record.type;
myVMname = host.getEntityByReference(VclFinderType.VM, VMref);
}
}
Server.log (myVMname.name);
ChangeVMCPUParameters.put("vm",myVMname);
ChangeVMCPUParameters.put("cpuNumber",INPNewCPU);var ChangeVMCPUWorkflowToken = new WorkflowToken() ;
ChangeVMmemWorkflowToken = AttChangeVMCPUWF.execute(ChangeVMCPUParameters);
ChangeVMCPUWorkflowTokens = new Array();
ChangeVMCPUWorkflowTokens.push(ChangeVMmemWorkflowToken);
System.getModule("com.vmware.library.workflow").waitAllWorkflowComplete(ChangeVMCPUWorkflowTokens)
NIC Caller:
var ChangeVMCPUParameters = new Properties();
var queryService = INPVMvApp.getHost().getQueryService();
var expression = new VclExpression(VclQueryVMField.NAME, INPVMNameString , VclExpressionType.EQUALS);
var filter = new VclFilter(expression);
var params = new VclQueryParams();
params.setFilter(filter);
var resultSet = queryService.queryRecords(VclQueryRecordType.ADMINVM, params);
var records = resultSet.getRecords(new VclQueryResultAdminVMRecord());
Server.log (records.length);
for each (var record in records) {if (record.vdc == vdc.getReference().href) {
Server.log("i am in the VMREF")
var VMref = new VclReference();VMref.href = record.href;
VMref.name = record.name;
VMref.type = record.type;
myVMname = host.getEntityByReference(VclFinderType.VM, VMref);
}
}
Server.log (myVMname.name);
ChangeVMCPUParameters.put("vm",myVMname);
ChangeVMCPUParameters.put("ipAddressingMode",ipAddressingMode);var ChangeVMCPUWorkflowToken = new WorkflowToken() ;
ChangeVMmemWorkflowToken = AttChangeVMCPUWF.execute(ChangeVMCPUParameters);
ChangeVMCPUWorkflowTokens = new Array();
ChangeVMCPUWorkflowTokens.push(ChangeVMmemWorkflowToken);
System.getModule("com.vmware.library.workflow").waitAllWorkflowComplete(ChangeVMCPUWorkflowTokens)
Now we finished with our callers scripts, let us go back to the original code to see what is happening.
now to continue interpreting the CSV file, to do that, we need to modify the original script we used to read the CSV file to be like this (this is the final script code):
var i = 0;
var csvFileName = "c:\\Orchestrator\\customer.csv";
Server.log(csvFileName);var fileReader = new FileReader(csvFileName);
fileReader.open();
var line=fileReader.readLine();
Server.log (line);while (line != null){
Server.log ("loop Started");
var lineValues = line.split(",");
var linelength = lineValues.length
var vmname = lineValues[0];
var INPTemplateNameString = lineValues[1];
var MyNoCPU = lineValues[2];
var MyNoMemory = lineValues[3] * 1000;
var MyNoNICS = lineValues[4];
var addVMworkflowParameters = new Properties();
var ChangeVMmemworkflowParameters = new Properties();
var ChangeVMCPUworkflowParameters = new Properties();
var ChangeVMNICworkflowParameters = new Properties();addVMworkflowParameters.put("INPdestinationVapp",MyVappName);
addVMworkflowParameters.put("INPTemplateNameString",INPTemplateNameString);
addVMworkflowParameters.put("INPVMNameString",vmname);
var myaddVMWorkflowToken = new WorkflowToken() ;
myaddVMWorkflowToken = MyAddVMWF.execute(addVMworkflowParameters);
myaddVMworkflowTokens = new Array();
myaddVMworkflowTokens.push(myaddVMWorkflowToken);
System.getModule("com.vmware.library.workflow").waitAllWorkflowComplete(myaddVMworkflowTokens)while (MyNoNICS > 0)
{
ChangeVMNICworkflowParameters.put("INPVMNameString",vmname);
ChangeVMNICworkflowParameters.put("INPVMvApp",MyVappName);
ChangeVMNICworkflowParameters.put("INPVMvDC",myvdcname);
var myaddNICWorkflowToken = new WorkflowToken() ;
myaddNICWorkflowToken = AttNICWF.execute(ChangeVMNICworkflowParameters);
myaddNICWorkflowTokenS = new Array();
myaddNICWorkflowTokenS.push(myaddNICWorkflowToken);
System.getModule("com.vmware.library.workflow").waitAllWorkflowComplete(myaddNICWorkflowTokenS)MyNoNICS = MyNoNICS – 1
}Server.log("Adding Memory to" + " " + vmname);
ChangeVMmemworkflowParameters.put("INPVMNameString",vmname);
ChangeVMmemworkflowParameters.put("INPNewMem",MyNoMemory);
ChangeVMmemworkflowParameters.put("INPVMvApp",MyVappName);
ChangeVMmemworkflowParameters.put("INPVMvDC",myvdcname);
var ChangeVMmemWorkflowToken = new WorkflowToken() ;
ChangeVMmemWorkflowToken = AttMemWF.execute(ChangeVMmemworkflowParameters);
ChangeVMmemWorkflowTokens = new Array();
ChangeVMmemWorkflowTokens.push(ChangeVMmemWorkflowToken);
System.getModule("com.vmware.library.workflow").waitAllWorkflowComplete(ChangeVMmemWorkflowTokens)Server.log("Adding CPU to" + " " + vmname);
ChangeVMCPUworkflowParameters.put("INPVMNameString",vmname);
ChangeVMCPUworkflowParameters.put("INPNewCPU",MyNoCPU);
ChangeVMCPUworkflowParameters.put("INPVMvApp",MyVappName);
ChangeVMCPUworkflowParameters.put("INPVMvDC",myvdcname);
var ChangeVMCPUWorkflowToken = new WorkflowToken() ;
ChangeVMCPUWorkflowToken = AttCPUWF.execute(ChangeVMCPUworkflowParameters);
ChangeVMCPUWorkflowTokens = new Array();
ChangeVMCPUWorkflowTokens.push(ChangeVMCPUWorkflowToken);
System.getModule("com.vmware.library.workflow").waitAllWorkflowComplete(ChangeVMCPUWorkflowToken)Server.log("Adding NICs to" + " " + vmname);
var j = 5;
while (j < linelength)
{
Server.log ("i" + " " + i);
Server.log ("j" + " " + j);
Server.log ("linelength" + " " + linelength);
Server.log ("lineValues[j]" + " " + lineValues[j]);
var addHDworkflowParameters = new Properties();addHDworkflowParameters.put("host",host);
addHDworkflowParameters.put("vdc",myvdcname);
addHDworkflowParameters.put("vapp",MyVappName);
addHDworkflowParameters.put("hdsize",lineValues[j]);
addHDworkflowParameters.put("vmname",vmname);
var myaddHDWorkflowToken = new WorkflowToken() ;
myaddHDWorkflowToken = MyAddVHDWF.execute(addHDworkflowParameters);
myaddHDworkflowTokens = new Array();
myaddHDworkflowTokens.push(myaddHDWorkflowToken);
System.getModule("com.vmware.library.workflow").waitAllWorkflowComplete(myaddHDworkflowTokens)
j = j + 1;}
i = i + 1;
Server.log("looping");
line=fileReader.readLine();
}
fileReader.close;
no we are reading the file, storing the configuration in parameters, cloning the VM then looping through the configuration of NIC, vCPU and memory to configure the VM accordingly, let us take a look to what is happening exactly.
Adding NICs:
The following portion of the above code adds NICs to each VM, let us see how:
while (MyNoNICS > 0)
{
ChangeVMNICworkflowParameters.put("INPVMNameString",vmname);
ChangeVMNICworkflowParameters.put("INPVMvApp",MyVappName);
ChangeVMNICworkflowParameters.put("INPVMvDC",myvdcname);
var myaddNICWorkflowToken = new WorkflowToken() ;
myaddNICWorkflowToken = AttNICWF.execute(ChangeVMNICworkflowParameters);
myaddNICWorkflowTokenS = new Array();
myaddNICWorkflowTokenS.push(myaddNICWorkflowToken);
System.getModule("com.vmware.library.workflow").waitAllWorkflowComplete(myaddNICWorkflowTokenS)MyNoNICS = MyNoNICS – 1
}
The above code creates a workflow parameters with VM name, VApp and vDC, then we create a token and execute The Caller script, the workflow then go and execute and return some parameters that is necessary for the Add NIC workflow and execute the Add NIC workflow.
the same goes for the rest of callers and java codes with different parameters and attributes.
once all set and done, you are ready to go, and this will read the CSV, create org, vdc, vapp, vms with the specifications you set in the CSV.
below is a copy of the workflows to import them and have a look.
https://skydrive.live.com/redir?resid=6B566FD2C47B21C4%21130
In Part 4 we will look on how to add approval and send email notifications.
Merry Christmas.
vCloud Orchestrator, Automating Org,vDC,vApp Provisioning via CSV Part2–reading CSV files
In part 2 of this series, we will explore the required java script code required to read CSV file and load the information into vCO.
Reference: https://communities.vmware.com/thread/445802
To use the code, drop a scriptable task element in the workflow, and make sure to link all the required parameters to it from the previous workflows:
The code will read the following CSV file format:
the csv has the following format: VMname,OS Edition,No. of CPU. Memory, No. Of Disks, HD1 size in GB, HD2 Size in GB, HDX size in GB.
now the JavaScript code required to read this file is:
var csvFileName = "c:\\Orchestrator\\customer.csv";
Server.log(csvFileName);var fileReader = new FileReader(csvFileName);
fileReader.open();
var line=fileReader.readLine();
Server.log (line);while (line != null){
Server.log ("loop Started");
var lineValues = line.split(",");
var linelength = lineValues.length
var vmname = lineValues[0];
var MyTemplateName = lineValues[1];
var MyNoCPU = lineValues[2];
var MyNoMemory = lineValues[3];
var MyNoDisks = lineValues[4];addVMworkflowParameters.put("INPdestinationVapp",MyVappName);
addVMworkflowParameters.put("INPTemplateNameString",INPTemplateNameString);
addVMworkflowParameters.put("INPVMNameString",vmname);
var myaddVMWorkflowToken = new WorkflowToken() ;
myaddVMWorkflowToken = MyAddVMWF.execute(addVMworkflowParameters);
myaddVMworkflowTokens = new Array();
myaddVMworkflowTokens.push(myaddVMWorkflowToken);
System.getModule("com.vmware.library.workflow").waitAllWorkflowComplete(myaddVMworkflowTokens)
The first section read the file and opens it then starts reading the file line by line, the While loop will start looping through the file contents line by line and splitting each line using “,” as a delimiter.
once the information is loaded, we are ready to take actions in each line, the actions will be running workflows to create the VM and assign the proper NIC, Memory and CPU to it.
The Second part, Will call another workflow, but let us explore why we are doing that…
Running External Workflow using JavaScript and wait for its completion:
The work flows that we will run is a custom workflow that we will create to lookup the data from vCloud Director, what do we mean, let us explore:
To create a VM from a template VM, we will create a vDC with all the templates that we need:
We will use those VMs as templates that we can close, but let us explore first the built-in workflow in orchestrator “Add vApp Virtual Machine”:
This Workflow takes the following inputs as parameters:
a vApp where the VM will be placed, the source vm that will be cloned and the new VM name, the problem is that the vm input is from type vCloud:VM, but the VM name we read from the CSV file is string, so we need to search for the template by its name and return the object vCLoud:VM type with that name to this workflow.
Note: I wish if there is something like powershell (get-vm –name “myvm”) byt there isn’t , if you know a better way, I will be glad to do so.
So, how we can search the VM by name, we will create a new workflow with a scriptable task as following:
and takes the following inputs:
Configured with the following parameters:
and the scriptable task element runs the following code and configured with the following local inputs:
var CloneVMWFParameters = new Properties();
var queryService = AttSourceVapp.getHost().getQueryService();
var expression = new VclExpression(VclQueryVMField.NAME, INPTemplateNameString , VclExpressionType.EQUALS);
var filter = new VclFilter(expression);
var params = new VclQueryParams();
params.setFilter(filter);
var resultSet = queryService.queryRecords(VclQueryRecordType.ADMINVM, params);
var records = resultSet.getRecords(new VclQueryResultAdminVMRecord());
Server.log (records.length);
for each (var record in records) {
if (record.vdc == vdc.getReference().href) {
var VMref = new VclReference();VMref.href = record.href;
VMref.name = record.name;
VMref.type = record.type;
myVMname = host.getEntityByReference(VclFinderType.VM, VMref);
}
}CloneVMWFParameters.put("vApp",INPdestinationVapp);
CloneVMWFParameters.put("vm",myVMname);
CloneVMWFParameters.put("vmName",INPVMNameString);var myCloneVMWorkflowToken = new WorkflowToken() ;
myCloneVMWorkflowToken = AttvappVMWF.execute(CloneVMWFParameters);
myCloneVMWorkflowTokens = new Array();
myCloneVMWorkflowTokens.push(myCloneVMWorkflowToken);
System.getModule("com.vmware.library.workflow").waitAllWorkflowComplete(myCloneVMWorkflowTokens)
The workflow creates a variable CloneVMWFParameters of type properties and creates a new query to search for a VM with the name of the template, it will make sure that this VM is located inside the vDC where templates are stored (if (record.vdc == vdc.getReference().href) ) then returns the VMobject with its href and name and type.
we then construct a a workflow properties to call the “Add vApp Virtual Machine workflow” with the vApp, VM object and New VM Name and then execute it and wait for its completion.
Reverting back to the initial code, we talked about:
addVMworkflowParameters.put("INPdestinationVapp",MyVappName);
addVMworkflowParameters.put("INPTemplateNameString",INPTemplateNameString);
addVMworkflowParameters.put("INPVMNameString",vmname);
var myaddVMWorkflowToken = new WorkflowToken() ;
myaddVMWorkflowToken = MyAddVMWF.execute(addVMworkflowParameters);
myaddVMworkflowTokens = new Array();
myaddVMworkflowTokens.push(myaddVMWorkflowToken);
System.getModule("com.vmware.library.workflow").waitAllWorkflowComplete(myaddVMworkflowTokens)
So we are creating the var addVMworkflowParameters as properties and we construct the properties with following parameters (INPdestinationVapp name “the vApp was just created”, INPTemplateNameString “the name of the template VM, this name was read from the CSV”, and the INPVMNameString which is the new VM name”).
Now our caller workflow will query the vcloud director for the template name, return the VM object corresponding to it, and then call the “Add vApp Virtual Machine” workflow with the parameters and copy the VM to the destination vApp.
If you have a smarter way to do it, let me know, I got the feeling that there might be a better way to do it.
In part 3, we will add NICs, Memory and HDs and in part 4 we will take a look on how to send email notification and add approval cycle, so stay tuned ![]() .
.
vCloud Orchestrator, Automating Org,vDC,vApp Provisioning via CSV Part1
Hi There, during the past months I was working on this insane idea of automating the cloud provisioning. I eat,drink and breath (probably piss) cloud but I had a dream about automating the provisioning cycle and making it smart.
In this blogging series we will explore how you can use your vSphere, vCenter, vCloud and vCloud Orchestrator to provisioning clouds on the fly.
I know that there are a lot of blogs out there that speaks about how you can put some workflows to provide simple provisioning, this blog will take it a notch higher by doing it in a practical way. you don’t expect in real life people to login and supply cloud’s information, everything is in Excel.
By the end of this blog series we will:
– Configure cloud provisioning to provision Org, vDC and vApp using a single user input and link 3 workflows.
– Provision a VMs based on settings supplied in a CSV file, we will customize the HD sizes and no. of those VMs based on the settings supplied in the CSV.
– We will add a twist to add approval cycle to the process and send email to the approver with the CSV file to review and a link to approve the request, cool ha ![]() .
.
If you are old or new to orchestrator I guess you will like this series, we will touch on core concepts as well as new/advanced concepts with some Javascripting as well, so let us get started:
Part 1: Linking “Add Org” , “Add a vDC” and “Compose a vApp”:
before we get started, make a folder in your vCO and call it for example (Full cloud provisioning) and duplicate the “Add Org” , “Add a vDC” and “Compose a vApp”.
Create a workflow, call it Full Cloud Provisioning or any name you want, and add the workflows to it to create an org, then a vDC and a vApp, and link them together.
once the workflows are linked, we need to work our way through the in-parameters so we can have them set properly.
The workflows will required various inputs including the default vCloud host, Org/vDC name and various types of settings like lease duration, storage profile..etc, the most important thing for this blog post is the name, so link the inputs in the Add Org workflow as following:
you can set the other settings like (LDAP mode, SMTP host..etc) as attributes and pass them to the input parameters and that will make those inputs not needed thus not visible by the user, you can do the same of number of VMs, storage/memory/CPU limits, or you can have them in the presentation, for the purpose of my lab, I linked them to attributes in the my workflow, so they are static for every customer, but you might want to customize that based on your environment:
here is how I set my parameters:
Passing out-parameters to Input parameters in vCloud Orchestrator:
Before delving in this, let us discuss first the vCO attributes/input types. If you noticed in the above screenshot, you will find that we have (for example) an attribute called host and its type is vCloud: host, so what is the type thing?!
Attributes/inputs are defined in types based on their usage, so if you are doing same mathematical operations, you create a variable of type (Number), to hold text data you create a variable of type (String).
In vCO, we have additional set of types, like the vCloud:host or vCloud:vDC (those are for example, we have zillions of other types), which allows you to set these variables, parameters or inputs to carry specific type of data in them.
For Example, the host type, will always expect to carry in or out a vcloud:host data, you can’t pass text (string) to it but you can take it out as string, and same for a vDC, it will always expect to carry in/out a vDC.
Why I Explored this first, because if you set everything correctly and run the workflow, you will find that the add vDC workflow expects to be hosted within organization, and we need to specify the organization where this vDC will be hosted (and the same applies for vApp since it needs a vDC), but we can’t specify the vDC because it has been not create yet and the same is true for the organization, so how can we fix that ?!
I spent a month trying to figure this one out, I came from .net/Opalis background where we can pass the outs of one workflow/program to the inputs of another workflow/program, but this is not the case in vCO, you can’t do that.
To do that, you will need to create a parameter of the same type that you want to pass the out parameters to it , where it could be carried to the next workflow as in-parameters, you must pay attention to the type or the data won’t pass.
so for example, I created a parameter called MMvDC (I should have named it MyOrg) with the type vCloud: Organization, to carry the organization name from my “Add Org” workflow to the create vDC workflow, the same for mVDCName attribute of type vCloud:vDC to carry the vDC name from the Add a vDC workflow to the Compose a vApp workflow.
The next step is to bind the out parameters to those attribute, so to carry the organization name, I need to link this attribute with the out parameter, and since attributes are accessible across all workflows, I can use this attribute in any upcoming workflow and this is how we can skip entering organization/vDC names in subsequent workflows because they will receive those inputs with the correct types in there in parameters:
Now in the Add vDC workflow, you can see that it needs input (org) as type vCloud: organization, but I can supply this input on the fly from the previous workflow by linking the MMvDC attribute to the org input:
You can also see that I linked the vDCout parameter to the myVDCname attribute to carry the VDC to the compose vApp workflow.
by doing the above trick and working out the required inputs/parameters, the resulting workflow and presentation will be something like this:
So all what you need to do is supply organization name, and vCO will go and create in vCloud director an organization, a vDC and vApp inside that vDC to host VMs.
In the next blogpost, we will explore how we can read a CSV file and create VMs inside that vApp ![]() .
.
Which question I will ask to VMware CTO Steve Herrod?
Today, https://www.facebook.com/VMworldTV announced that they have an interview with VMware CTO Steve herrod, they posted on facebook that if you got a question post it in the comment section and he will answer it.
I couldn’t miss that chance, I wanted to ask him the only question that I keep asking myself everyday, Why VMware is not afraid (or pretends to be not) from Microsoft’s competition.
We can’t argue about VMware’s Technology, it is an excellent one, but also let us be fair, Microsoft did her part of the homework and came up with great cloud solutions and virtualization platform with Windows Server 2012.
sometimes, I feel like VMware ignoring the competition, they still feel superior, which is a problem from my point of view, ignoring a company like Microsoft is not the solution. you have to work your ass very hard because they will eat you alive.
I would like to hear the answer from Mr. Steve, I hope that it will not a political answer, I hope that it will be a real and fruitful answer.
I will wait and post the answer,hopefully…
Installing ESXi 5.1 & vCenter 5.1 on VirtualBox
This is a probably silly post, but I wanted to create a reference for all of those guys installing ESXi 5.1 in general and using VirtualBox, the steps are the same as ESXi 5.0, so here we go:
ESXi Machine Configuration on VirtualBox:
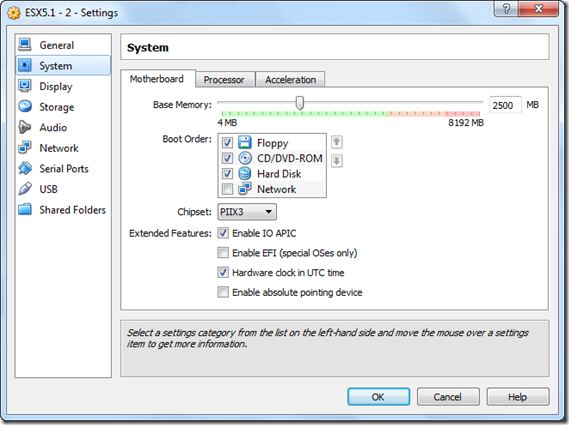
For the VM, create a Lunix 64-bit machine, and configure it as following:
at least 2100 MB of memory (ESXi installation will not complete if he detects memory below 2 GB):
For the CPU, configure the machine with at least 2 processors, the installation will not continue if have 1 CPU:
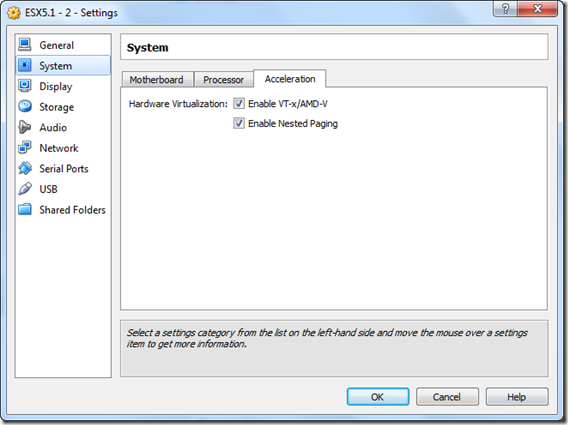
You might want to configure acceleration, however you won’t be able to start 64-bit machines on ESXi nested inside VirtualBox, this is because the VB doesn’t virtualize the CPU virtualization capabilities to VMs running inside it (sad).
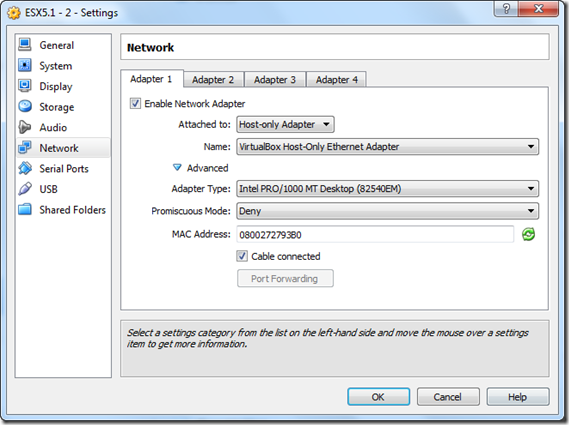
For the network, make sure to select a network that is detectable by the ESXi installation:
once done, map the ISO file and let us rockNroll ![]() .
.
Installing ESXi 5.1:
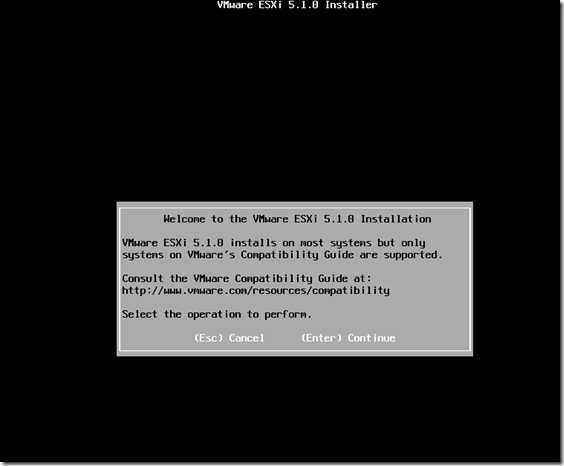
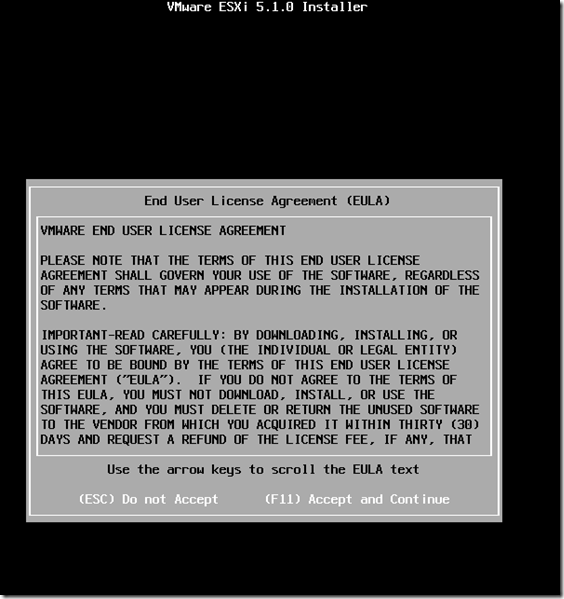
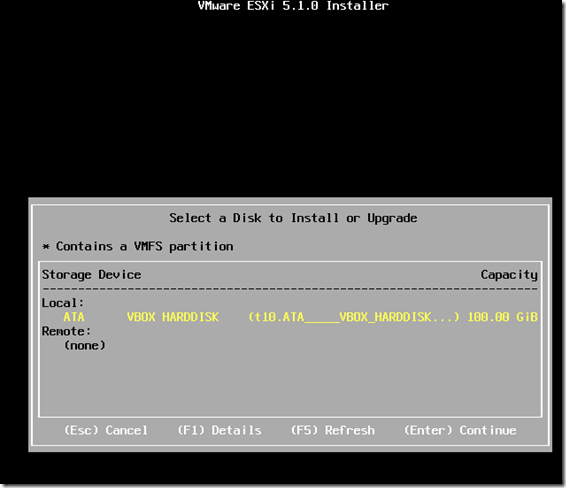
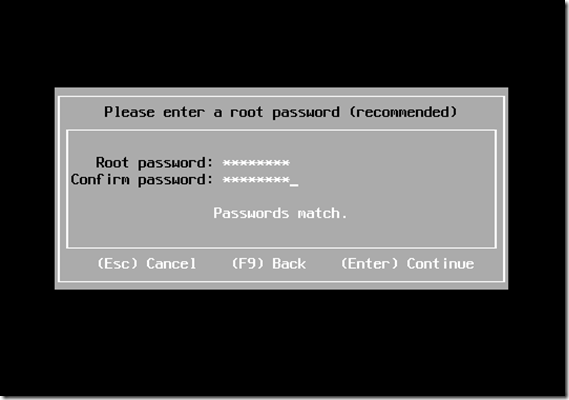
The screenshots are direct:
Once done you are on the go, wait for the installation to complete.
Installing vCenter 5.1:
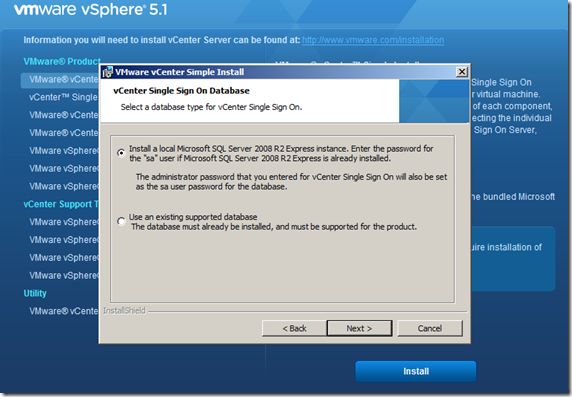
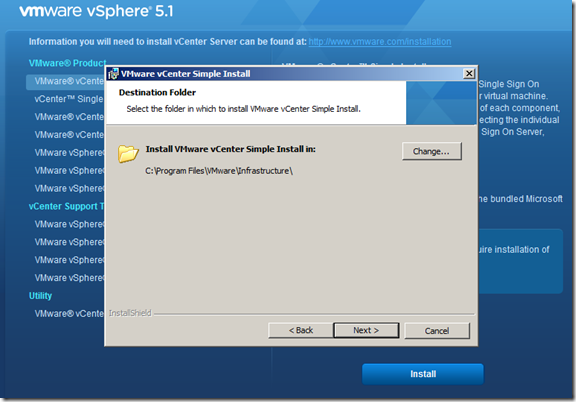
vCenter 5.1 introduce the new SSO thing, in this article, I am choosing to install the Basic SSO/vCenter combination, for the full SSO cluster thing, I will highly recommend http://derek858.blogspot.com/2012/09/vmware-vcenter-51-installation-part-1.html
Let us start with our next, next ok Journey:
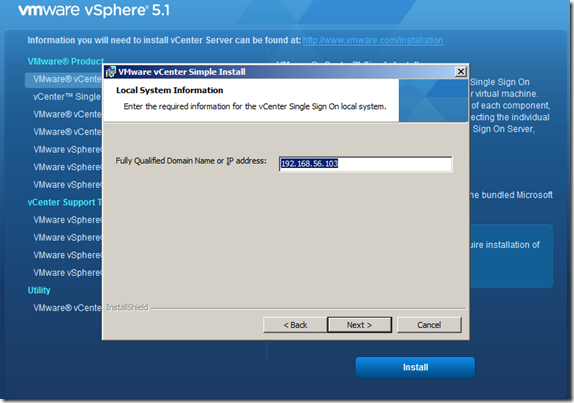
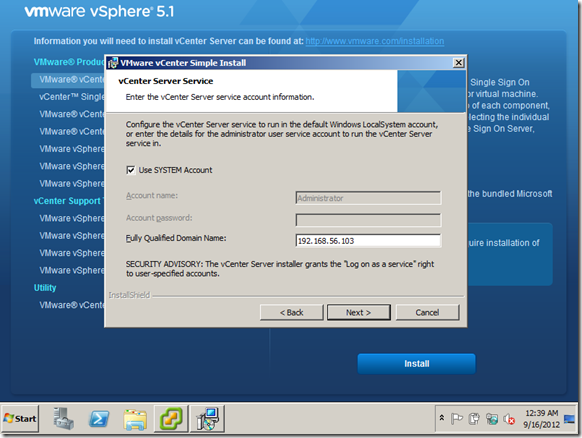
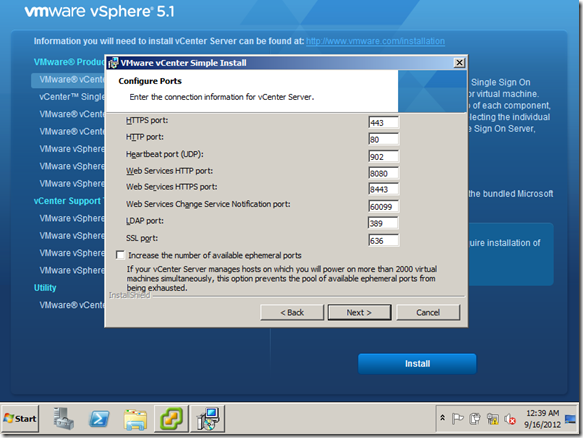
Once done with the SSO, setup will prompt you for the service information:
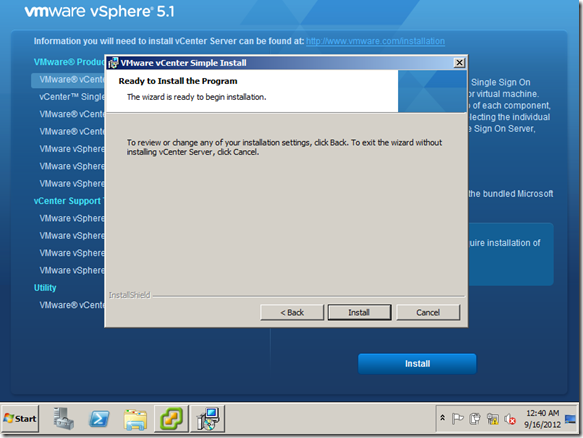
So once installed you are done with your single server installation, congrats….![]()


![SNAGHTML3693045[5] SNAGHTML3693045[5]](https://autodiscover.files.wordpress.com/2012/09/snaghtml36930455_thumb.png)
