Archive
Dude, What are the 5 elements I must consider in my virtual machine backups?
The new business demands and challenges pushed IT organizations and Pros to rush into using virtualization/cloud technologies, with this push comes a huge challenge in selecting the proper backup method and spotting the key factors to consider when designing backups for virtual machine.
To help you addressing this challenge and spotting those points, we will release a white paper that identifies key elements to consider when backing up and recovering virtual machines and explains them in details.
So stuff like Agent or agentless backup, unified or virtual specific backups, Data Deduplication (how, when) with virtual machines, large backup sets, granular vs. one backup/restore set, adding to that great and critical tips for applications (AD, SQL and Exchange), Hypervisors (VMware/Hyper-v) and network layer.
This unique white paper has been written by a group of the best minds in applications, virtualization and backup worlds, the authors of this white paper are:
- Thomas Maurer: Thomas is Hyper-v MVP, well known in his contributions in System Center, Hyper-v and cloud community.
- Mikko Nykyri: VMware vExpert and virtualization product mangaer for backup exec.
- me, Mahmoud Magdy
In this white paper; Published at Symantec here http://ow.ly/kOQBJ , we bring you the top points to consider, key factors and top issues to identify when backing up and restoring virtual machines, we will also go through a Google hangout session discussing those elements in details.
so start tuned, and follow us on Twitter, Linkedin and facebook and wish you all happy backup and successful restore.
Understanding Netbackup Appliances.
I got a lot of questions around my previous blog post (Install and configure Netbackup Appliances https://autodiscover.wordpress.com/2012/10/02/install-and-configure-the-netbackup-appliance-5220/) the questions where about what are the Netbackup Appliances and what are the difference between them and Netbackup solutions and other Backup Solutions.
So, in this article we will introduce these appliances and explore their capabilities.
Netbackup Appliances Architecture, Models and features:
you can think about the Netbackup Appliances as if it is you got Netbackup server with huge amount storage attached to it, there is an important point, not storage that makes Netbackup appliances sexy, it is the features that accompanies the Netbackup appliances.
Netbackup appliances comes with 2 flavours, 5020 series and 5200 series.
The 5020 Series is the smaller one, it has the following features:
|
Netbackup 5020 Appliance |
The perfect place for those appliances in existing NBU infrastructure, and introducing deduplication infrastructure (a long with the replication capabilities these devices have, these devices also are perfect for DR hubs and branch offices), to know more about the deduplication effect for NBU devices check my article https://autodiscover.wordpress.com/2012/09/30/what-does-it-mean-to-you-have-your-backup-data-globally-de-duped-using-netabckup-appliances/ ).
The 5200 series is the bigger one, they have the same features as the 5020 series, but they have additional feature, in which they have NBU installed on the appliance itself, which means; that you don’t need to have NBU separately installed and you can introduce the 5200 series to an organization that doesn’t run NBU or looking to migrate their NBU.
Why I should use the appliance ?!
You might wonder and say, why should I use the appliance, I can install the NBU software and attach it to disk pools or any storage based appliance, but there are so many benefits of running the appliances including:
- Faster deployments, as you have seen in the previous blog, installing the appliance actually takes less than an hour (I can argue it is 30 minutes max), so you don’t have to go through a complex process of installing/configuring and NBU.
- Specialized hardware that is “Telco Grade” hardware and designed/optimized to run NB.
- Those devices are protected by the Symantec security agent and running special made OS, the security agent will prevent malicious attempts to modify/tamper the data/operating system and less susceptible to attacks.
- you get the replication license and the NBU license which is transferable, once you get and AFAIK you don’t need to buy extra licenses for extra devices.
The following diagram outlines the SAN clients along with dedup/replication bases between the devices, there are so many ways these can be used and personally, I find them freakin awesome ![]() .
.
I hope that this short article helped you to digest the NB appliances, also make sure to check the website http://www.symantec.com/backup-appliance , and feel free to post a comment asking me anything!.
Install and Configure the Netbackup Appliance 5220
As promised, we will start today the journey of installing and configuring Netbackup Appliances, from my point of view it will be very cool blogging series, and the first of its type, in this blog series we will do the following:
- Install and Configure Netbackup 5220 Master Appliance.
- Install and Configure Netbackup 5220 DR appliance.
- Install and Configure Netbackup 5020 Master Appliance.
- Install and Configure Netbackup 5020 DR appliance.
- Backup and Restore VMware Data and hopefully….Exchange 2010

So, without any further ado, let us rock and roll…
Install and Configure Netbackup 5220 Appliance:
the install and configuration of the Netbackup appliance is fairly easy, I have to admit that I am so surprised about that, the device boots with the default IP 192.168.1.1, and then you can use the web interface to configure it by browsing to http://192.168.1.1
Once logged in, you can use the setup appliance to setup your appliance:
The first page prompt you for the network configuration, select the interface, Netbackup appliance support wide rage of bonding option (or eth channel if you like this name), set your IP configuration (make sure that you have a route defined) and click next:
In the following page, enter the DNS server and SMTP server (to receive email notification):
Make sure that DNS setup is done:
In the NNTP, setup the NTTP server:
Make sure that it is completed successfully:
In the security, you get the chance to change your password, if you don’t want to click next:
In the role selection page, you get the chance to select the appliance role (either master or media) and the media appliance can be connected to a master server or a master appliance, since this is the first device, let us configure it as a master:
Now the appliance will be online once the setup is done, it takes around 10 minutes to complete:
Once rebooted click the reconnect, now you have your Netbackup appliance up and running:
Now, if you open the normal Netbackup Console, you can type in the device name and login to the netbackup software:
Voila………..
now your device is up and running in master mode, you can start playing and creating backup policies and backup jobs, in the next blog post we will see how we can add the other devices and use their storage, and again do some Exchange backup…again.
What does it mean to you have your Backup data globally de-duped using Netabckup Appliances?!
Of course De-dupe is a great thing, the first time I realised what is De-duped was 3 years ago when I worked for a NetApp Partner and found out how they do De-Dupe on their SAN storage, I loved the ability to eliminate redundant data from your SAN.
But what does it mean to “globally” De-duped at your backup, and I will tell you later why I placed “globally” between brackets ![]() .
.
I didn’t care much for Backup De-Dupe, to be honest, I knew that De-dupe is cool but those are backups, they can be safely not De-Duped (if this is grammatically correct ![]() ), who cares right ?, I didn’t realise how much I was mistaken until 3 weeks ago when I attended the NetBackup Appliances training, as the same question was raised.
), who cares right ?, I didn’t realise how much I was mistaken until 3 weeks ago when I attended the NetBackup Appliances training, as the same question was raised.
The trainer explained an example that blew my mind, I didn’t realise how much saving a company can achieve using De-dupe backup data Globally, how, let us see:
Assuming a company that is operating 20 TB of Data (I made the examples little bit bigger to demonstrate how much saving you are getting), those data could be any type of data (VMs, Files, Mix or anything). let us check the following table for 2 weeks worth of backup data size (2 weeks to demonstrate the effect of full backups):
| Run | None De-duped size | De-duped size |
| First Week Full Backup | 20 TB | Maybe 10 TB (remember the data is De-duped and expected to see 50 to 60 % size reduction) |
| Full Week of Differential Data | 5 TB | 2.5 TB (De-Duped Data, size reduced) |
| Second Week Full Backup | 25 TB | maybe 0 or a worth of only 1 day of data, how much is that 100 GB ?!) |
| Total | 50 TB | 15 TB |
What?, why is that?, Well because Netbackup Appliances with the De-dupe will see the full backup again as data that can be De-Duped and will be 100% De-duped and will only backup the data that has been changed since the latest incremental backup. (how much is that, it will be for sure much more less than the full backup ![]() ).
).
Note: maybe the example is not fair, maybe your software is using some sort of de-dupe technique, but is it a global de-dupe, do you get the full de-dupe efficiency across all the data ?! do you get it across sites, is it mixed with the replication ?!
There is another edge, there are a lot of backup software that can do De-Dupe, but who can do it globally across all the backup sets that is running within the environment, I think none, all Backup Software do the trick on the Job basis, meaning that data within the single backup Job, Folder or disk is deduped, not globally across all the backup jobs, and ….and across the appliances themselves (DR site scenario or remote Sites with NBU appliances scenario).
I loved the backup De-dupe, I loved them so much, I will start from tomorrow let you see NBU appliances in action, I setup the lab and you will see the NBU Appliances effect starting tomorrow, buckle up and enjoy the ride.
Officially recognized as BackupExec BExpert , Thank you Symantec
I spotted a tweet by Sean Regan referring to a blog post by Matt Stephenson about Symantec’s BExperts program.
The program is still a new program, and similar to Microsoft’s MVP program and VMware’s vExperts program, to recognize the community experts who demonstrated exceptional skills within the Symantec’s and Backup Exec Community (more details could be found here ).
Today, I got the amazing news, Symantec Recognized me as one of the very early (I am according to the forum count No. 20) as a BExpert, yessssssssssssssssssssssssssssss.
The program still new and as I can see it started 5 months ago, however it is a distinguished recognition for my contribution during the past 2 years, I was blogging about Backup Exec and Exchange restoration, I knew that there was a lot of pain around the Exchange 2010 and Backup Exec and I just wanted to help, Also I was doing my best on Experts-Exchange.com on the backupexec section, just doing my best :).
I believe that the most important lessons learnt here, community effort always pays on personal and professional level ![]() .
.
Thank you Symantec for the recognition, I hope to to serve the community more and more.
Restoring Entire Mailbox Exchange 2010 Database using Backup Exec 2012 #Symantec #backupexec #msexchange
In previous posts we have seen how to backup Mailbox database and restore single item from the backup.
In this post we will explore how to restore the entire database to its original location, although you might ask why would I do that when I can restore the item that I want directly from my backup set, Well there might be some scenarios where you want to restore an entire database:
– Database corruption either physically or logically.
– reseed operation.
– restoring to restore database for finer search and extraction.
we will use the same backup we did last time to restore the entire database, let us start:
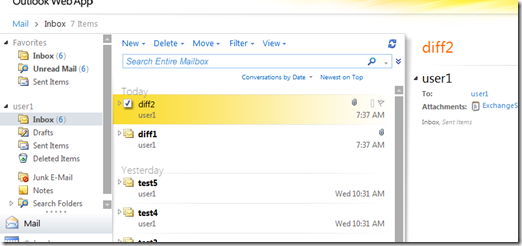
User one received 2 emails (Diff 1 and Diff2):
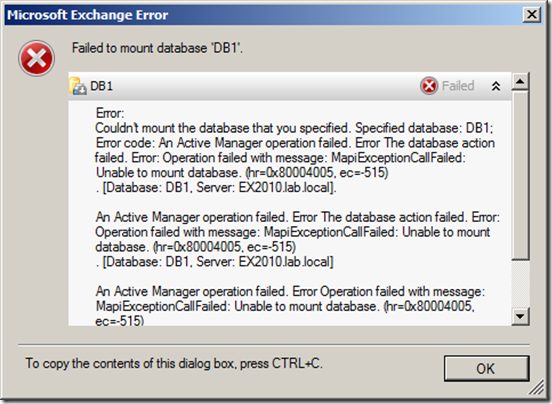
It looks that those emails some how caused a Database corruption, and the database is dismounted and can’t be mounted again (this simulates a logical or physical corruption at the database level):
If I try to mount it I get the error:
Also there is an error in the event viewer:
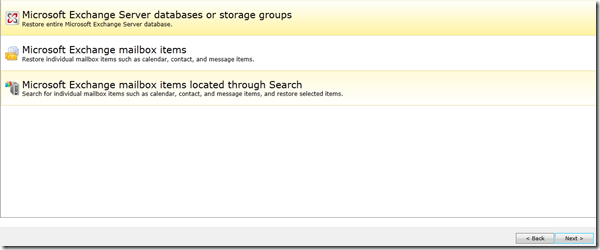
Now I need to restore the entire database, from the Backup Exec management console Select the Exchange server and click restore, in the restore type, select Microsoft Exchange databases or storage groups:
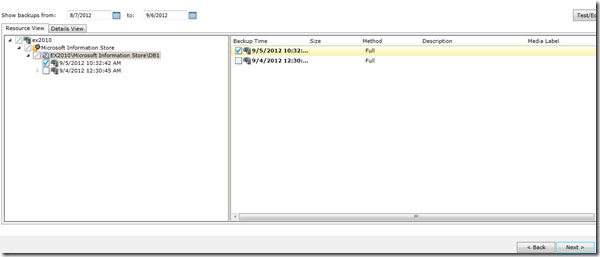
In the Resource view, select the backup job you want to restore:
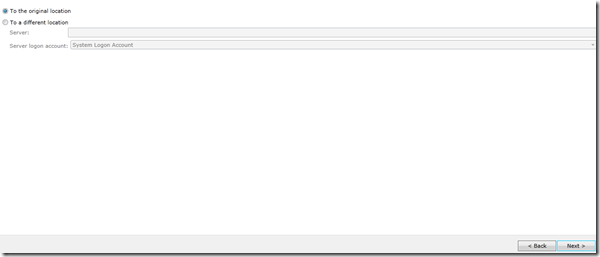
In the restore location, I will choose the original location since I want to restore it on top of the current one since the current one is corrupted, you might want to restore it to another location or the recovery database or to another server in case of dial-tone recovery.
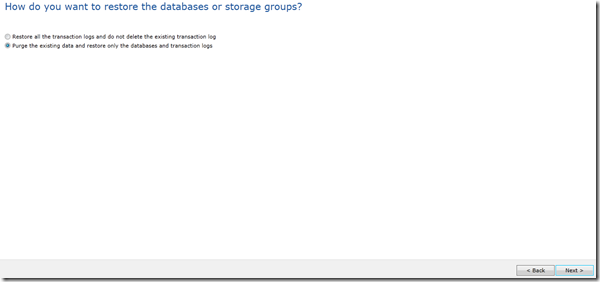
In the overwrite page, I will choose to overwrite existing DB and logs, if you trust that logs are ok and your DB is having troubles due to a corrupted harddisk for example you can restore the database set and keep exiting logs and when the replay starts it will restore the database into the most recent status, however in my case there is a logical corruption caused by bad emails thus bad logs, so I don’t want these and I will overwrite them:
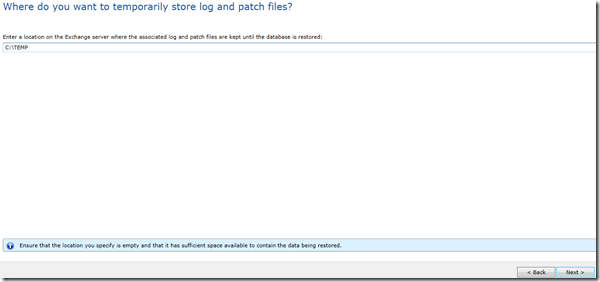
In the Temporary location, I will chose the default location, but you need to make sure that the selected location has enough space to hold the restored data:
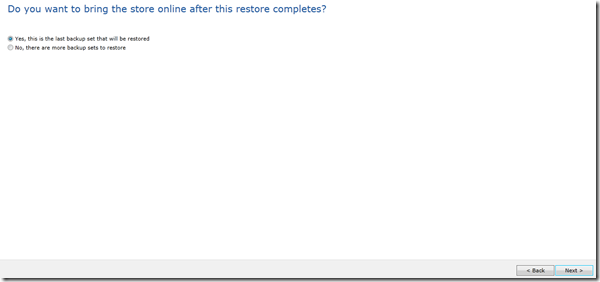
In the next screen, you have the option to wait to start mounting the database, if you are restoring from differential backup or you want to run eseutil before mounting the database for example you might want not to mount the database otherwise, the backup exec will mount the database and start playing the logs directly, in my case I will choose to mount the database:
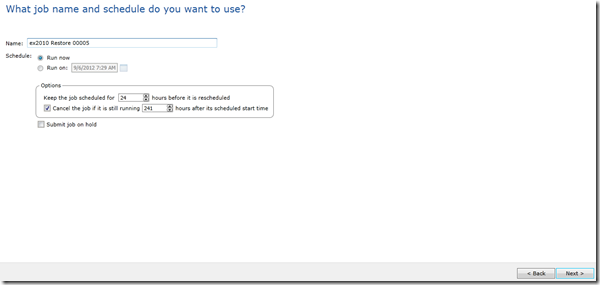
In the job name and schedule, set your options and click next:
on done, go to the Job list, select the restore job and click run now, the job will start restoring your database:
after the restore completes, the DB is mounted and everything is back to track :
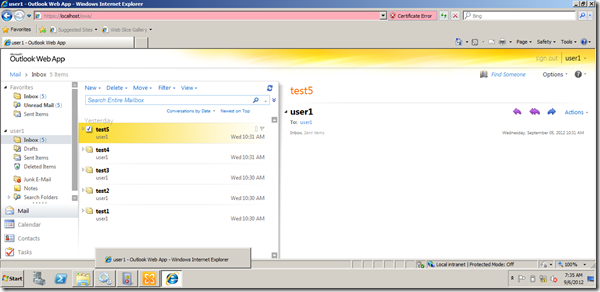
User1 can login now to his mailbox, but you will note that Diff1 and Diff2 emails (the problematic ones) are not restored since they are weren’t backed up:
In the next post we will see how to restore differential backup, we have been talking about the full backups and we will see how to configure and restore differential backups.


