vCloud Director automation via Orchestrator, Automating Org,vDC,vApp Provisioning via CSV Part4 – Adding Approval and Email Notifications
This is the final blog of this series, in the previous 3 parts:
we explored how to automate most of cloud provisioning elements including organizations, vDCs, vAPPs and Virtual machine and customizing their properties like adding vNICs, VHDs and memory/CPU.
In this final part, we will explore how we can add approval cycle to the above provisioning.
In our Scenarios, we will send an email notification to the administrator that include the CSV file used to generate the cloud as attachment, and include a hyperlink to approve/deny the request, let us see how we can do it.
Import the PowerShell Plugin:
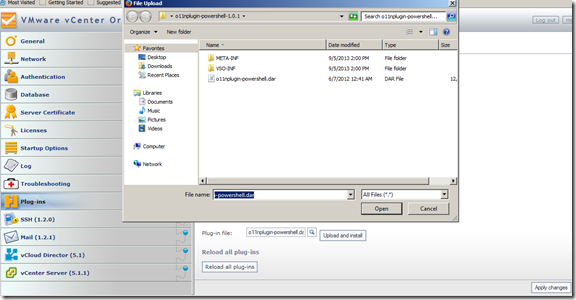
We will use Powershell to send email notifications, I tried to use Javascripting but had no luck with attaching the CSV, Powershell comes to rescue here, so you need to import the powershell plugin to your Orchestrator through the Orchestrator configuration interface:
Once you import the powershell plugin, make sure to restart the VCO.
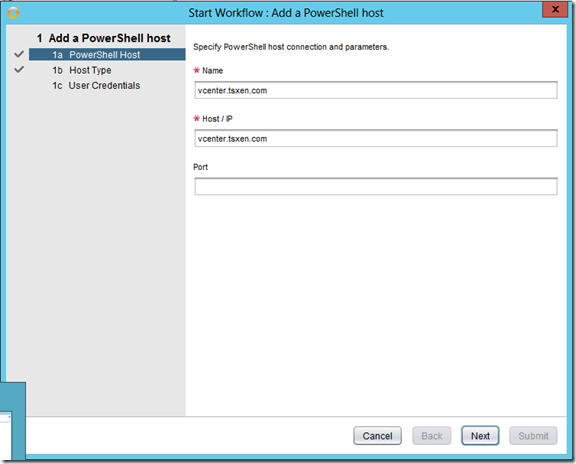
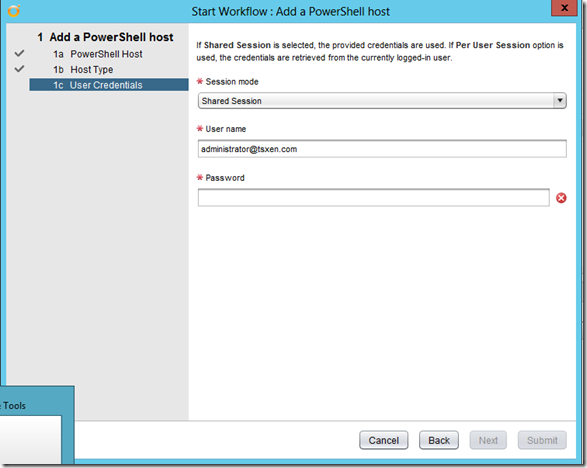
When you complete the restart, go to add a powershell host, you need to make sure that remote powershell is enabled on the server, once done kick of the add powershell host workflow:
if you are adding a kerberos host, make sure to type the username in UPN or email format otherwise you will get this weird error: Client not found in Kerberos database (6) (Dynamic Script Module name : addPowerShellHost#16)
Once added you are ready to go.
Building the Approval workflow:
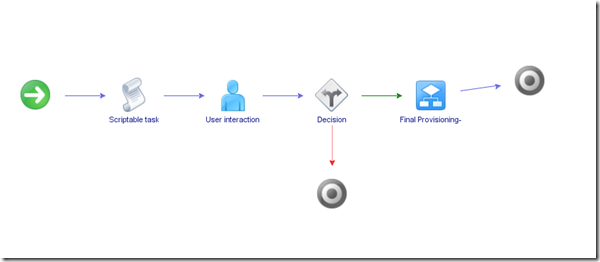
Build a workflow that includes user interaction and decision as following:
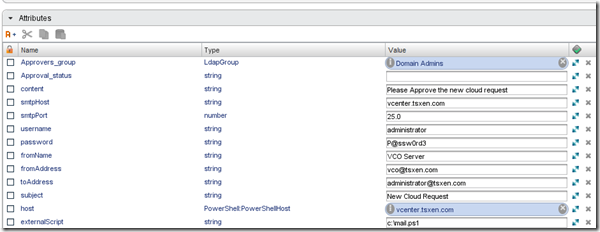
The attributes are defined as following:
the scriptable task, sends email notification with attachments as we said, let us the Javascript portion of it:
//var scriptpart0 = "$file =c:\\customer.csv"
// URL that will open a page directly on the user interaction, so that user can enter the corresponding inputs
var urlAnswer = workflow.getAnswerUrl().url ;
var orcdir = "C:\\orchestrator\\" ;
var fileWriter = new FileWriter(orcdir + name+".html")
var code = "<p>Click Here to <a href=\"" + urlAnswer + "\">Review it</a>";fileWriter.open() ;
fileWriter.writeLine(code) ;
fileWriter.close() ;var output;
var session;
try {
session = host.openSession();
var arg = name+".html";
Server.log (arg);
var script = ‘& "’ + externalScript + ‘" ‘ + arg;
output = System.getModule("com.vmware.library.powershell").invokeScript(host,script,session.getSessionId()) ;
} finally {
if (session){
host.closeSession(session.getSessionId());
}
}
The script attaches the CSV file, then starts the powershell script from the host and attaching the HTML file (in the arguments, this HTML file contains a link to approve the reqeust, and it was built in the above Javascript), let us see the powershell script:
Param ($filename)
$file = "c:\orchestrator\customer.csv"
$htmlfile = "C:\orchestrator\" + $filename
$smtpServer = "vcenter.tsxen.com"$att = new-object Net.Mail.Attachment($file)
$att1 = new-object Net.Mail.Attachment($htmlfile)$msg = new-object Net.Mail.MailMessage
$smtp = new-object Net.Mail.SmtpClient($smtpServer)
$msg.From = "emailadmin@test.com"
$msg.To.Add("administrator@tsxen.com")
$msg.Subject = "New Cloud is requested"
$msg.Body = "A new cloud service is request, attached the generation file, you can approve the request using the below link"
$msg.Attachments.Add($att)
$msg.Attachments.Add($att1)$smtp.Send($msg)
$att.Dispose()
Now you are ready to go, let see the outcome:
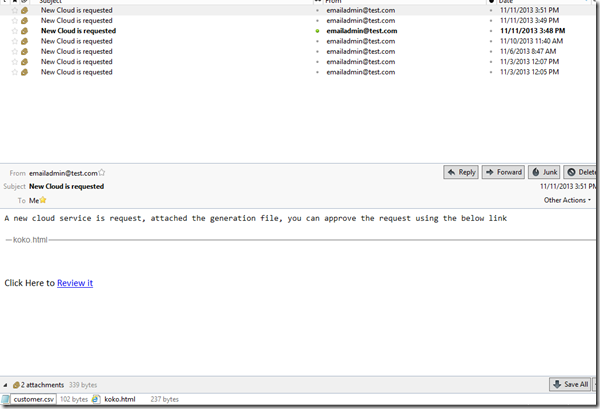
If you run the script successfully, you will receive the following email notification:
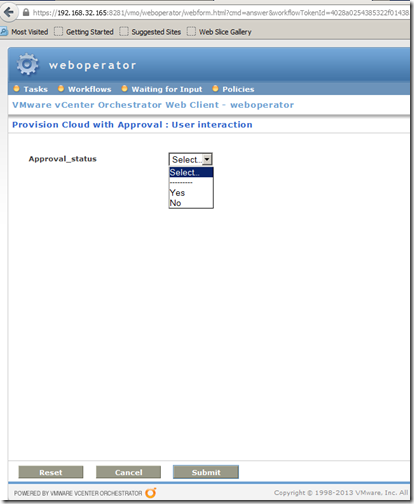
you can see the link to approve the request and the CSV file included in the email to approve it, if you click on the link, you can see the request and approve/deny it:
What is next:
You might think this is the end, however it is not, this blog series is the foundation of cloud automation and it is just a placeholder, cloud automation can go epic, here is some improvement suggestions for people who might want to take it further:
- Add error checking, the script is error checking free which might raise serious issues in production environment.
- Add More logging.
- Add automation to network provisioning and vShield operations.
- Automate application provisioning on top of provisioned VMs.
the above is a small list, we can spend years adding to this list, but those are the areas that I will be working on in the upcoming version of this script.
Till next.
